
How to Add and Suggest Changes.
_Short version:
- Fork the repo / Sync the repo
- Edit the relevant files
- Make a pull request._
The easy way is to annotate the text with the Hypothes.is toolbar - the strip down the right hand side of the text. For more substantial corrections, additions, or suggestions (including on the notebooks), a slightly more complicated flow can be used. We are also happy to receive suggestions via email, word documents, or whatever works for you. ODATE is a living document, and will change with time, one way or another!
A Github Approach
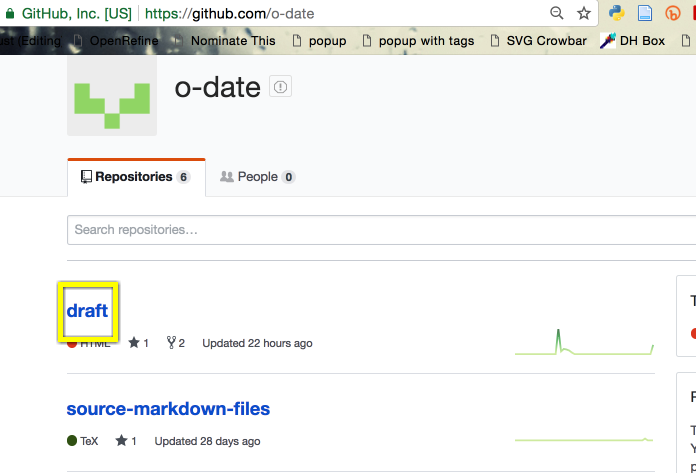
Find the o-date/draft repo:
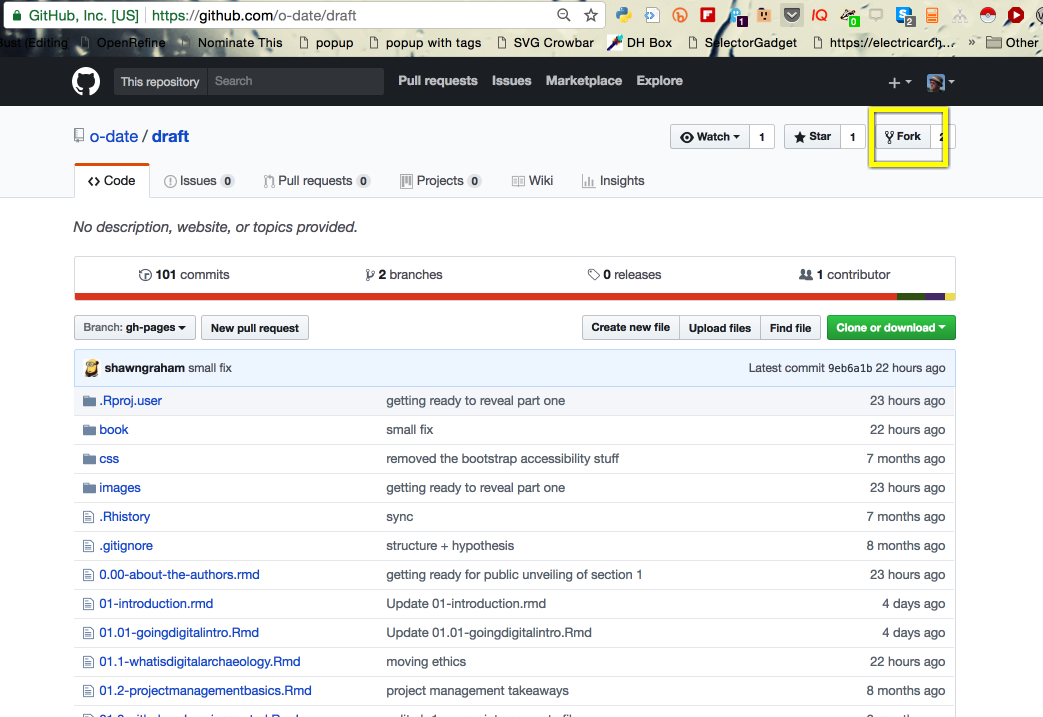
Hit the ‘fork’ button to make a copy:
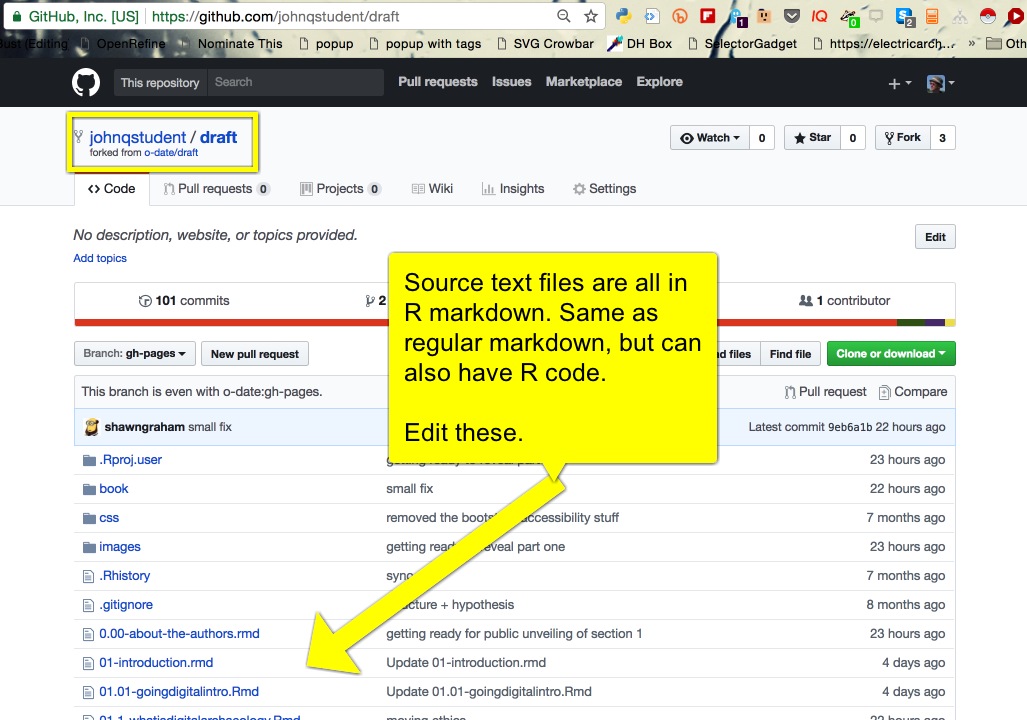
The files you want to edit all end in .rmd. Do not edit anything else. Note in the screenshot it says ‘this branch is even with o-date:gh-pages’. If it says ‘BEHIND’, see the ‘syncing a repo’ section at the bottom of this page.
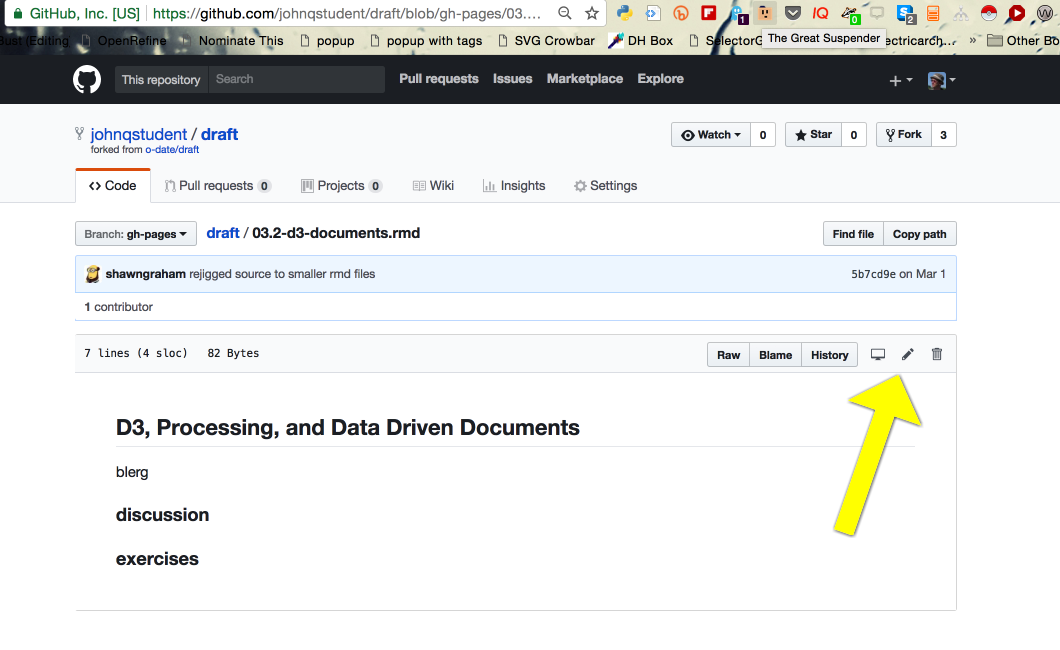
Hit the ‘edit’ icon - the pencil - to begin to write.
You can paste in text from a text editor if you prefer. We also like to toggle ‘soft wrap’.
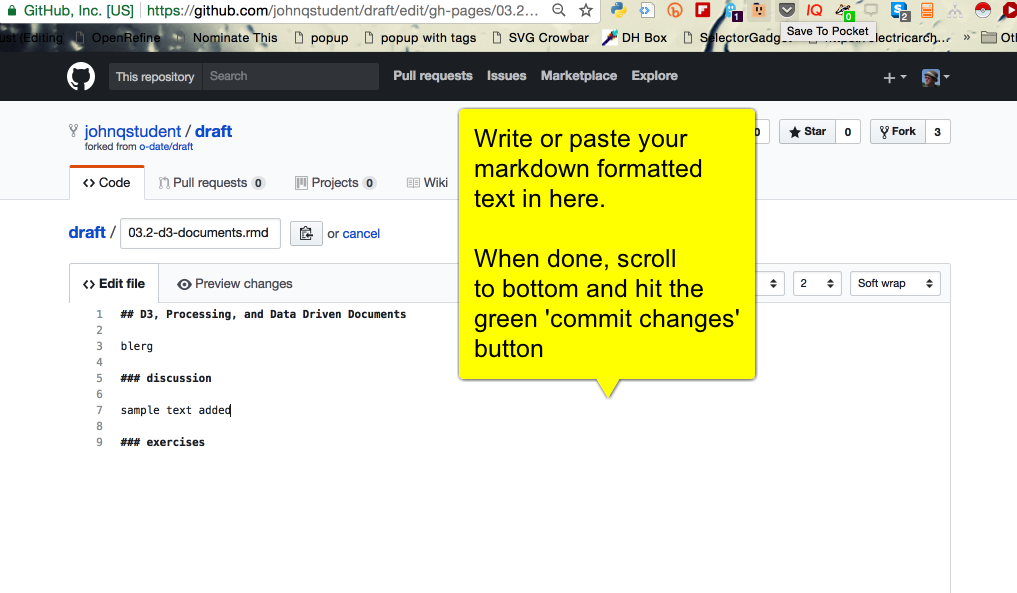
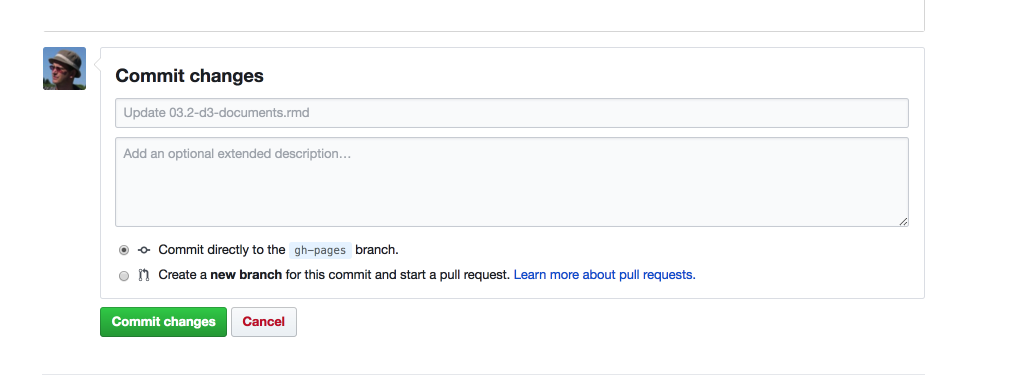
When you’re ready, scroll to the bottom of the page to ‘commit changes’, i.e., ‘save’. Leave a message indicating the nature of what you’ve done.
You can continue to make changes on the file(s) you’re working on. Once you’re satisfied, we move on to this step.
You’re now ready to ask us to pull - to incorporate- your changes into the main repository. This is a ‘Pull Request’.
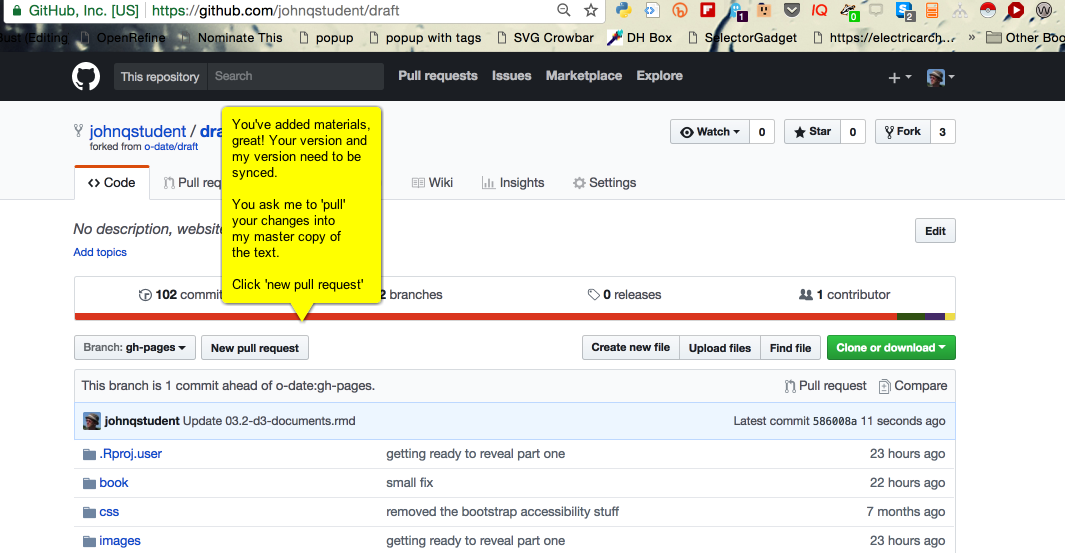
On this page, the only thing you need to do is hit the green button. The way to read the box above is ‘pull changes INTO this repo FROM this repo’.

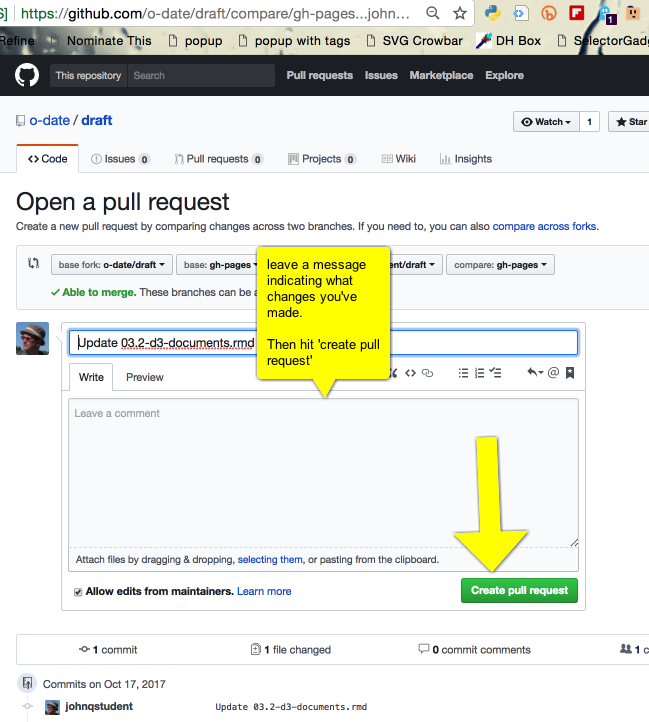
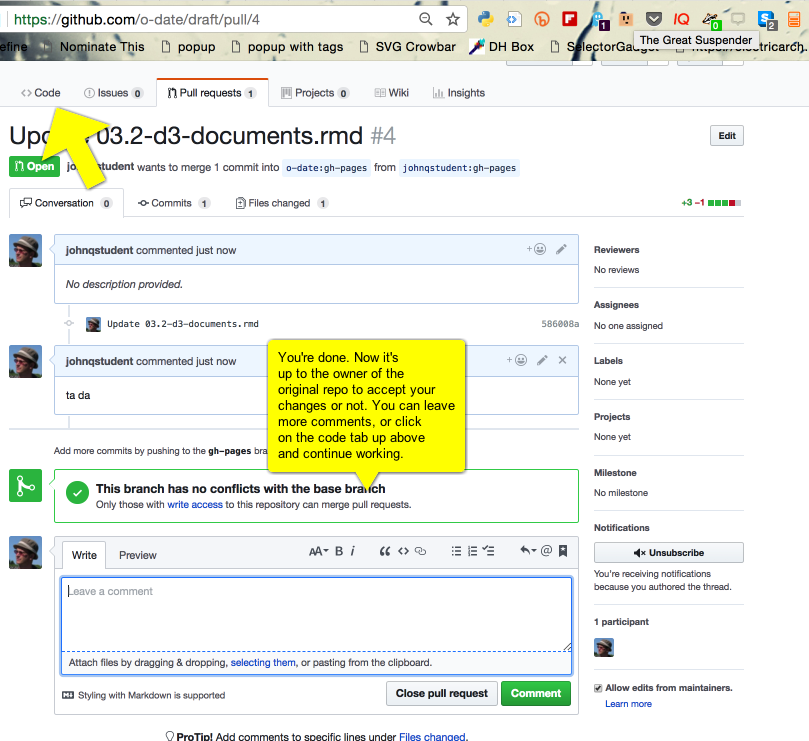
On this page, you leave a note describing the change(s) you’ve made. Then hit the green button.
Now you’re done. It should tell you that the changes can be merged. We will get a notification. You can continue to leave comments if you want. To continue working, hit the ‘code’ tab. If there are any issues at this stage (say two people have edited the same line at the same time), We’ll get a notification and will resolve the problem.
Making edits when your copy is BEHIND the official repo
That is to say, when your copy is BEHIND by x commits or snapshots, you have to ‘sync’ your copy of the repo with ours.
How to sync the repo
Once you’ve forked a copy, you might find that by the time you’re ready to do some work on it, the main repo might’ve been updated. You’ll know because there’ll be a gray bar across the top of the file list saying this branch is behind.
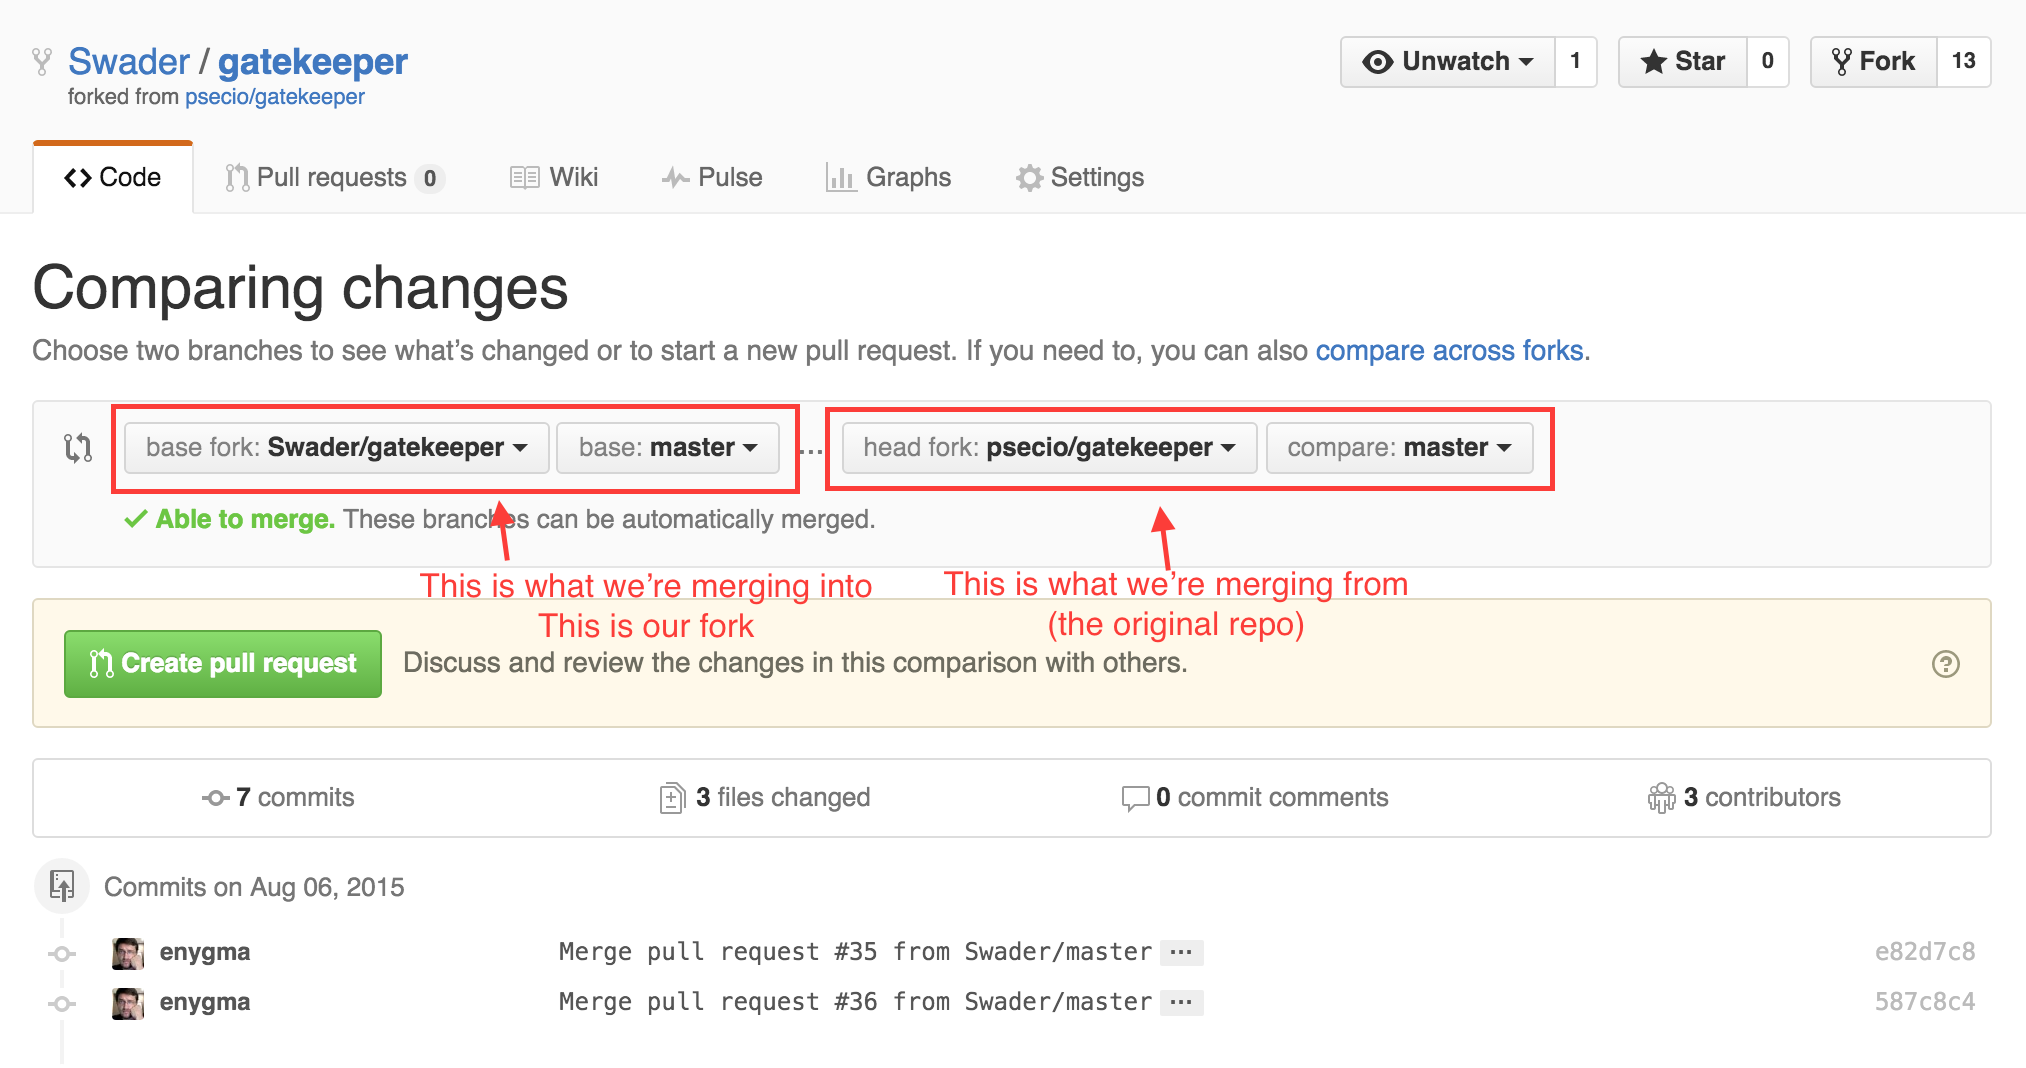
So what we’re going to do is pull INTO something FROM something.
(in the screenshots below, we’re using the images from this article) Notice that this repo is BEHIND. That’s why we want to sync. Begin by making a new pull request.
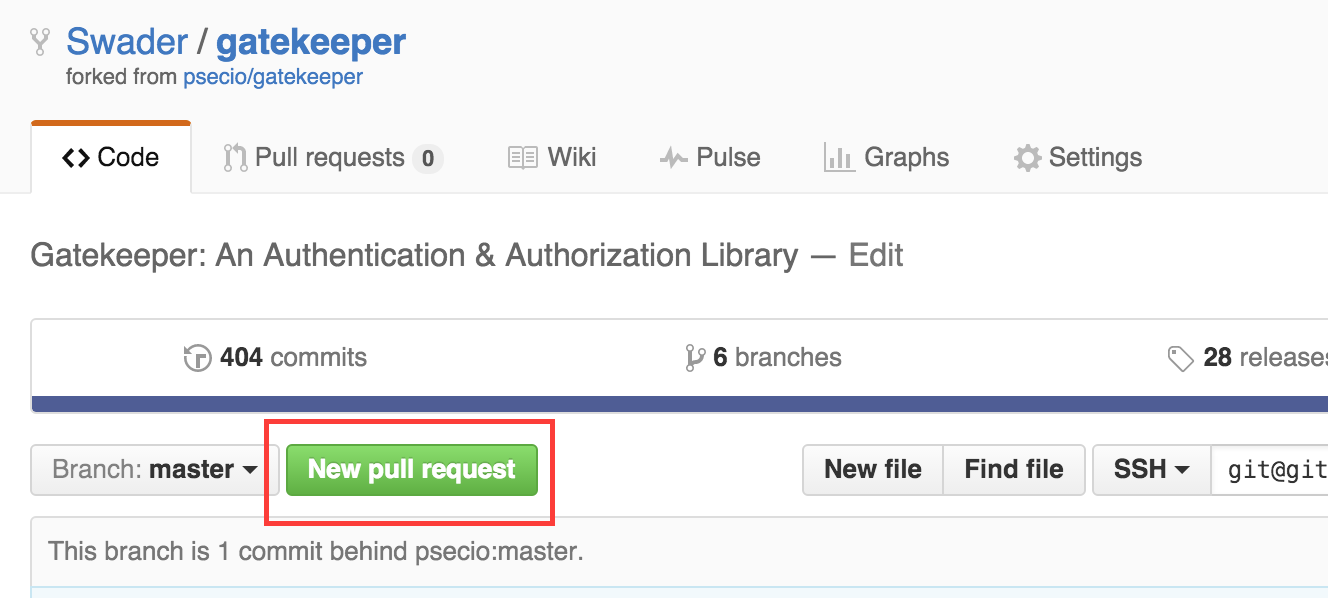
You’ll see something like this:
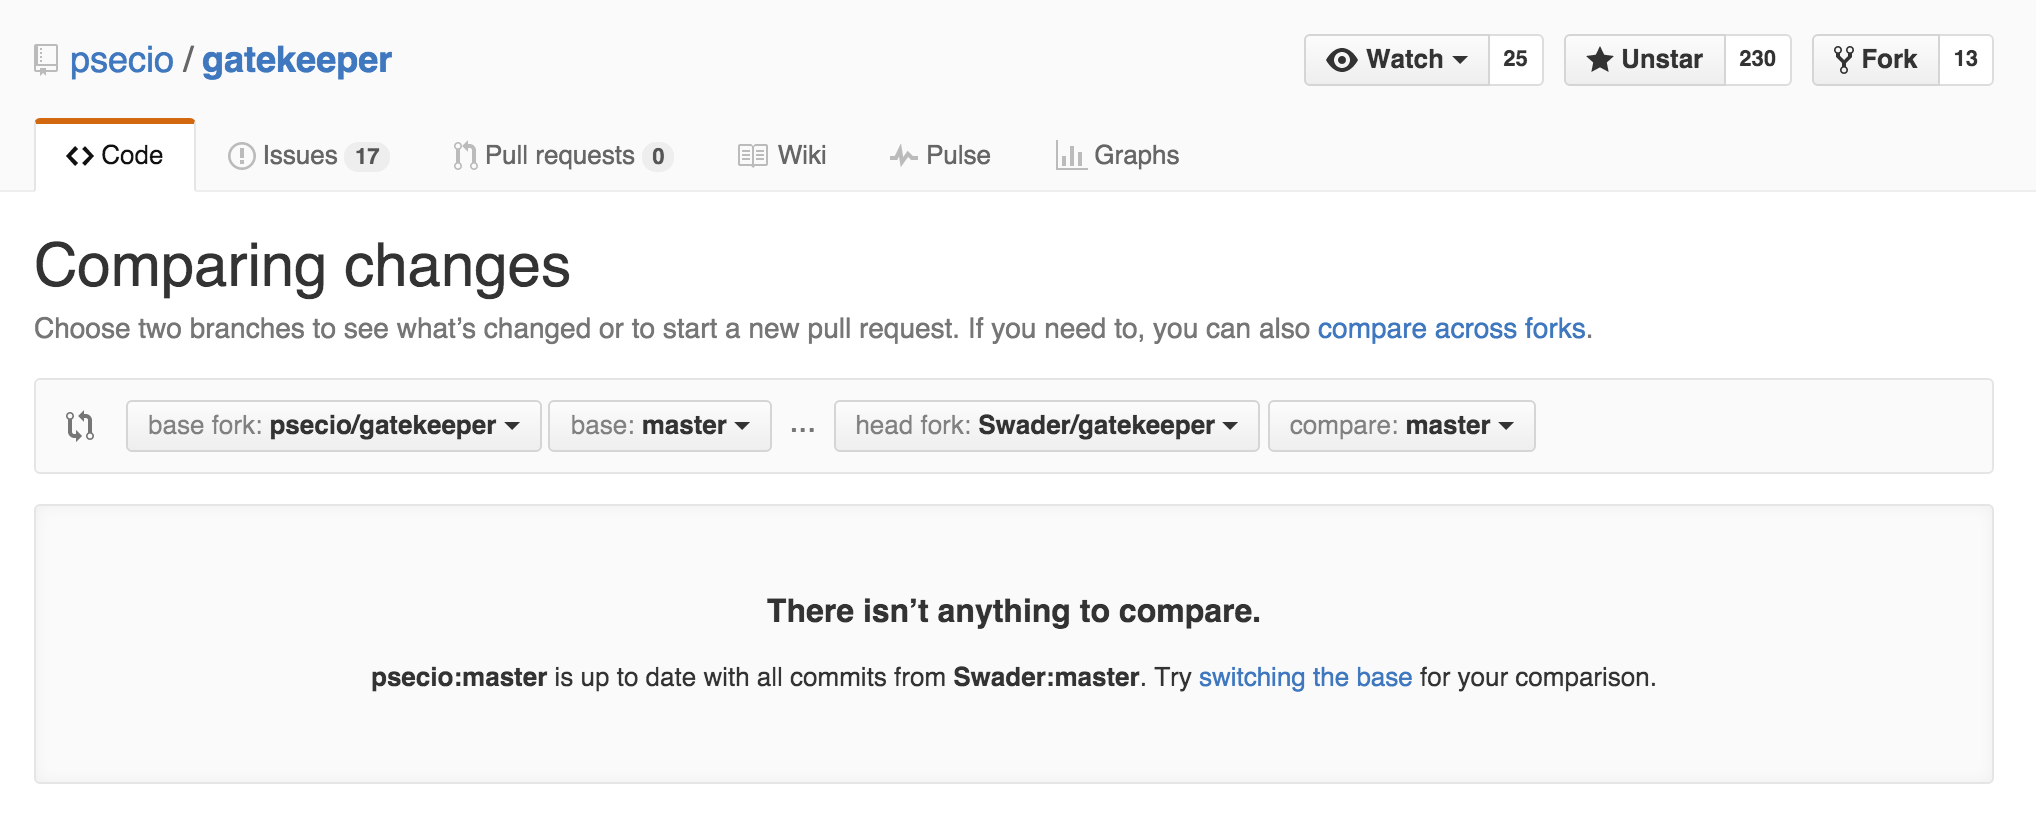
Click on the blue ‘switching the base’.
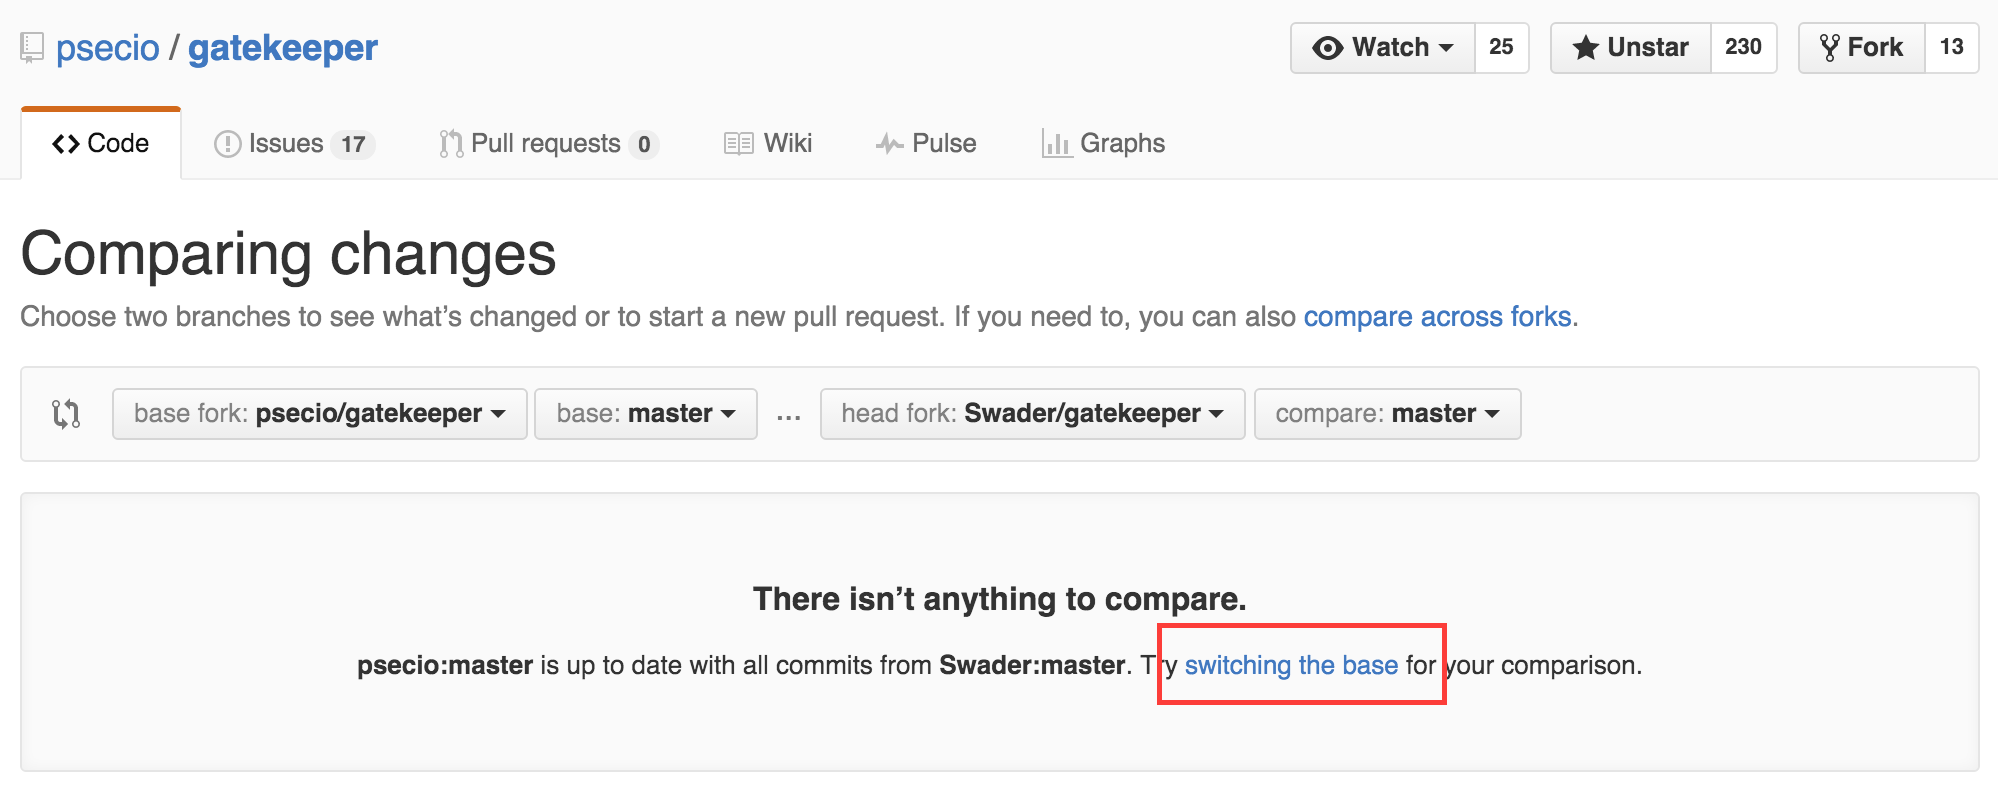
You’ll end up somewhere like this:
Click that green ‘create pull request’ button.
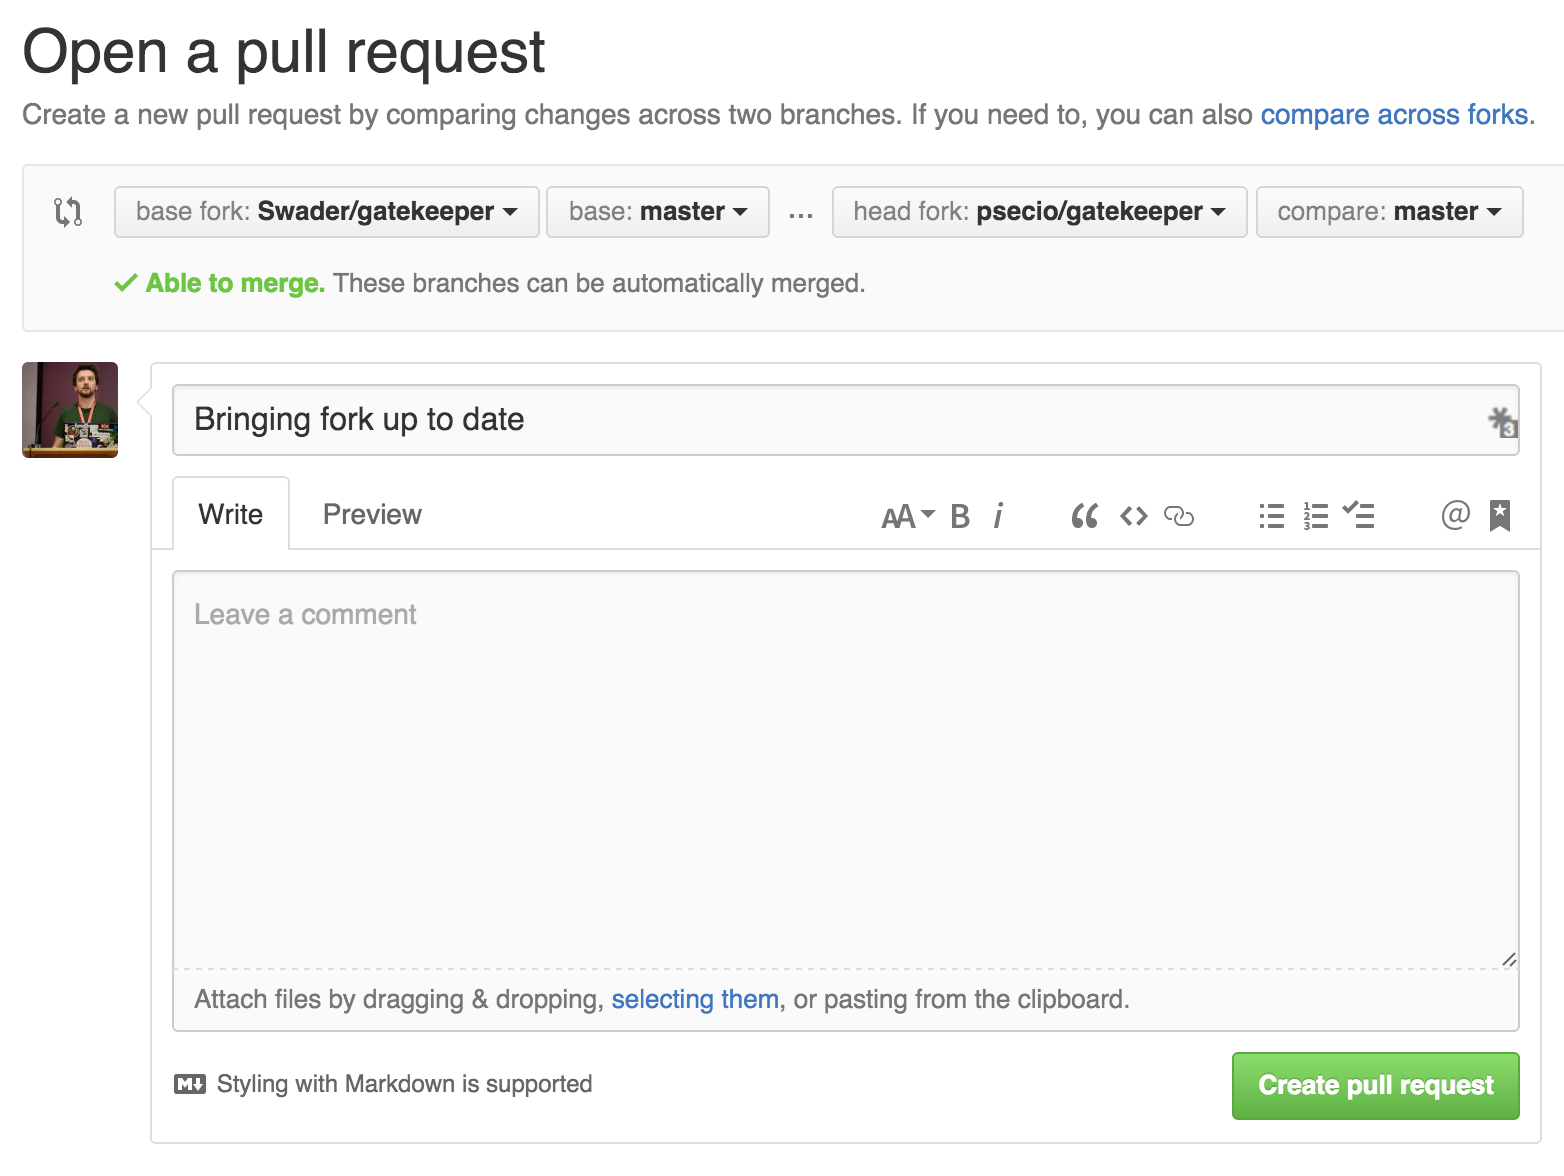
Leave a little message, like, ‘bringing things up to sync’. Hit the green ‘create pull request’ button again. You’ll see something like this:
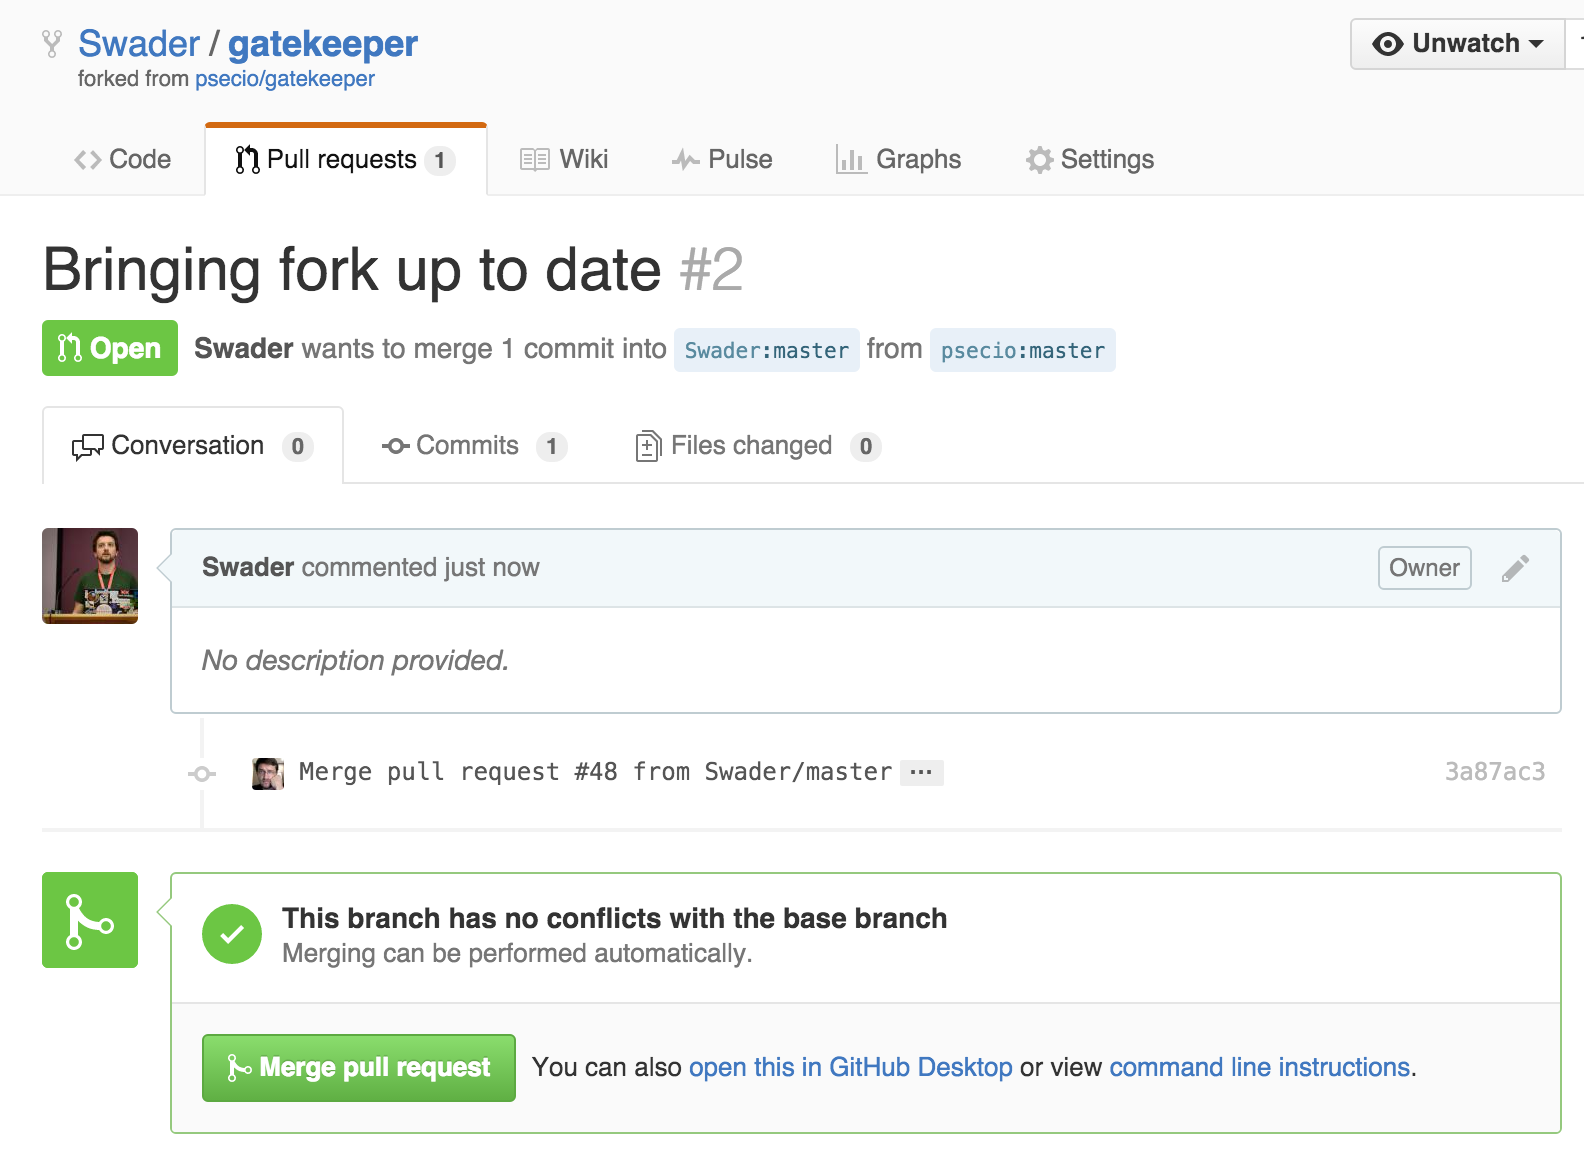
Hit the ‘merge pull request’ button, on the next screen hit the ‘confirm merge pull request’, and ta da! You’re up to date with my materials. (Screenshots from this article: https://www.sitepoint.com/quick-tip-sync-your-fork-with-the-original-without-the-cli/)
NB When you’re doing a pull request, REMEMBER that the idiom is PULL INTO repo FROM repo.
